Yesterday, I saw another great post  at JKOnTheRun about a software product called iPhotoMeasure. The concept behind iPhoto is that it lets you take a digital photo, and easily scale (Dimension) it based on a marker in the photo, in this case a 7.5×7.5″ or 15×15″ box (DigiTarget) printed on a sheet of paper. It is designed for general contractors as a way to scale photos and bid jobs based on photos a homeowner sends them.
This sounded like a very cool product, and reminded me of a project I was involved with many years ago for the DOD (I could tell you, but then,…. well, you know), albeit for a far different purpose.
I was also excited about this for use with our Tablet PC products, which make heavy use of digital cameras – seemed like there was some synergy there. So I decided to download a copy and see how well it worked, and share a very quick review. I’ll try some additional photos soon, and share those results too.
Unfortunately their eCommerce server was dying yesterday (a great problem to have if it was due to load), but I went back today and grabbed a copy for $99. The download and install process was fairly painless, though it did require several steps to get a serial number, and was requiring some out of the ordinary demographic data before I could get a serial number for a product I already paid for. Note to all ISVs – go read this great post from from Guy Kawasaki “10 Ways to Hinder Market Adoption”
Ok, so I am off and running… I print out a few of the 7.5″ DigiTargets, and make sure to tell my printer to do this at actual size (no scaling up or down). The result is a 7.25 square from both Adobe & FoxIT PDF tools from 2 printers. Odd, but probably still usable. I tape one on my wall, and take several camera phone photos from about 10 feet.
Loading up the software, I see that the entire application is a Macromedia Adobe Flash app, which is why it runs on Mac & PCs. As a side note, this seems like a very easy way to make it into a web based SaaS model – scale your photos for $1, $5, whatever, I’m sure they would get a lot of incremental homeowner business here as opposed to the $99 price tag.
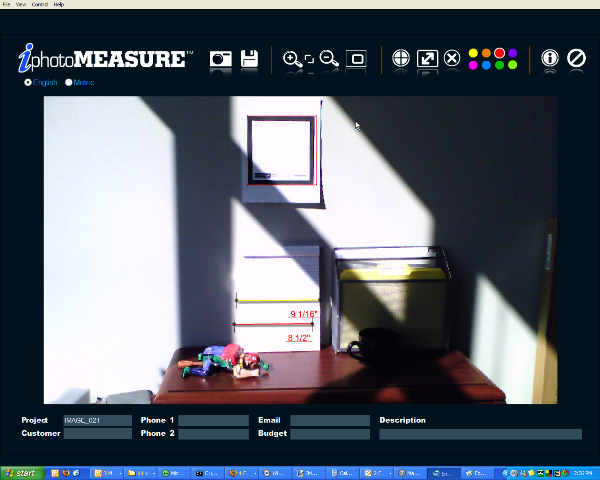
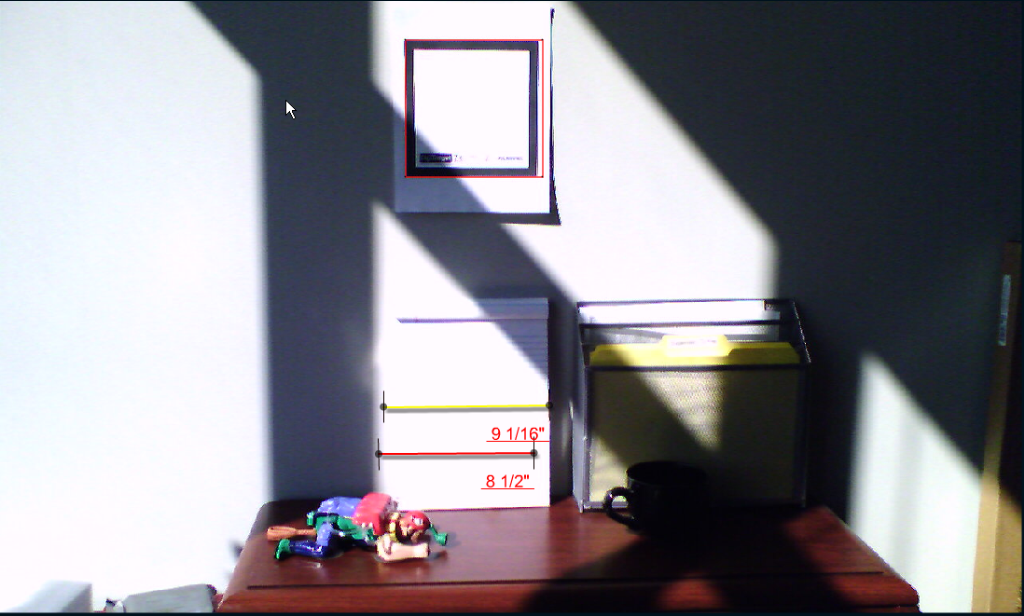
My expectation was that the software would isolate the DigiTarget, and automatically scale the photo based on that. Unfortunately it did not, and I had to manually zoom into the target and drag a bounding box around it to create the scale. When I did this, it also forced me to draw a perfect square, and did not allow for any skewing in the photo. In my example below, you can see that the photo was skewed, and the bounding box did not match the target. I think they should have allowed the user to draw a rectangle, and let the software extrapolate the X and Y scale based on that. Not a huge problem, and probably not a problem at all if it is a great photo from a 3+ megapixel camera.
Now that I have my scale set, I can drag lines to create dimensions of objects. As you can see from the example below, the 8.5″ paper I scaled is showing at 9 1/16″. I attribute this to the DigiTarget and photo skew. Overall it is very easy to dimension items, though based on what I am seeing it only works well for 2D objects. As an example, an object coming towards you (a wall to your left, as opposed to in front of you) would not scale accurately.
Ok, now that I am done with dimensions, I am ready to save. The app will let me save in their native format, but not anything useful (JPG, GIF etc..) for sharing the results. I had to use SnagIT to get the photos below. The app does allow for printing.
My (quick) Verdict: I think this is a very cool v1.0 application that has a ton of potential, and I see how it could be very beneficial to the contracting industry. I think there are quite a few items that need to be addressed to take this from a “Neat” product to a “Great” product, but they all seem (from a technical perspective) easily doable. I think the $99 price is high for personal / homeowner use, but will not be an issue for GCs (one or two saved trips to a customer will pay for this). Selling into the AEC (Architects, Engineers, Construction) verticals is by far the hardest vertical I have ever been involved selling in to. I think for iPhotoMeasure to succeed here they are going to need to create a free / lite demo version of the app, and make some of the improvements listed above. They have a winner on their hands, just need a few more minutes in the oven.


 CNN.com has a 12 step plan listed for email addiction. Oddly enough, one of the steps is not throwing away the Blackberry Crackberry. So go get started, and don’t fall off the wagon.
 This is more a personal reference than anything, but hopefully someone else will find it useful too. In Vista you can navigate to many of the system folders, such as the “Send To” folder by typing shell:<Command Name> (eg shell:sendto) in the Start/Search(aka Run) text box (See screen shot). This sure beats typing C:Users[UserID]AppDataRoamingMicrosoftWindowsSendTo to do the same thing.
 Here is a step by step guide to improving the camera / photo quality on the Asus R2H UMPC:
 at JKOnTheRun

 I came across a neat site this morning that does one thing, and does it well. The whole concept of