Thought I’d add a little more information here to help people get going with Images (and Ink!) In Live Writer(WLW). See part one of this article for the basics.
In part 1 I mentioned that DriveHQ is a free FTP service that works with WLW, and provides 1Gig of space. Note: I am not endorsing DriveHQ, it worked for me, and it is free for basic FTP – thats it.
So to get going with DriveHQ, create an account, login then:
- Create a folder to hold your blog images, do this by clicking on the My Storage
 Tab , and then New Folder
- For the purposes of this example, I am calling it Blog1 (but you can use any name you like)

- Now you need to make this folder public by publishing it. Just hover on the folder and the menu bar will pop up, select the option with the folder and globe. On the next screen, just review the options, defaults are fine, and click I agree & submit at the bottom. The next screen will show you the public URL which will be in the format: http://www.drivehq.com/file/df.aspx/publish/YourUserNameHere/Blog1 , make a note of this you will need it later.


- You are all set on the DriveHQ Side, now open WLW and create or edit you Weblog account (from the Weblog menu option)
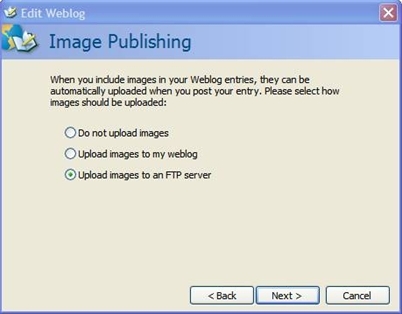
- When you get to the Image Publishing screen, select the FTP option

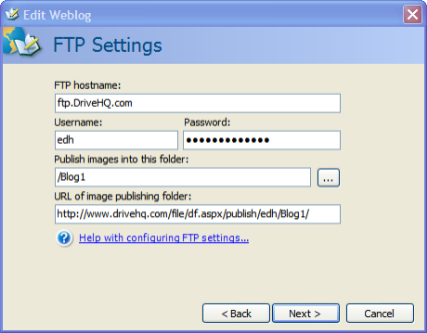
- Now edit the settings as you see below. Use your vaules for Drive HQ Username,Password, and URL (from the step above eg:http://www.drivehq.com/file/df.aspx/publish/YourUserNameHere/Blog1)
- Click next to finish up the wizard, and you should be all set!


 Version 1.0 of the Ink Blog Plugin for Windows Live Writer is now available!